
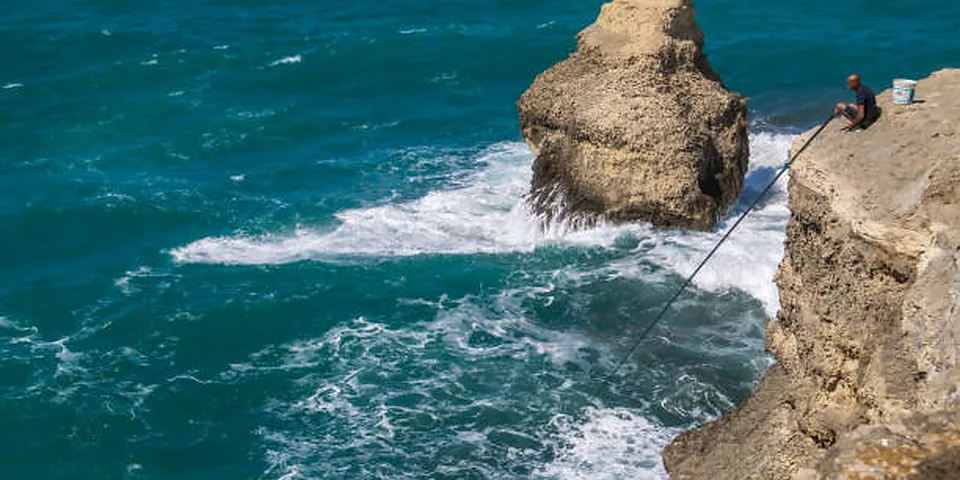
The best fishing headlamps and lights for beginners make a night trip easier to control. A headlamp keeps both hands free, a flashlight checks a route or landing area, and a lantern lights a small work space. A kayak may also need a separate visibility light.
The right setup is not simply the brightest one. Choose around the task, access point, glare, hooks, night vision, and whether you are standing on a bank or sitting in a kayak.
Quick Answer
For most beginners, start with a compact headlamp with adjustable brightness, a low red-light mode, and a water-resistant housing. Add a small handheld flashlight as a route-checking tool and backup.
- Use a headlamp for walking, tying knots, baiting hooks, and landing fish.
- Use a flashlight for a narrow inspection beam and as a backup.
- Use a lantern for a low, controlled work area on a stable bank.
- Use a clip light for a small local task, such as a tackle pouch.
- Use red light when preserving night vision and reducing glare matters.
- Use a separate navigation or visibility light when a kayak must be seen on the water.
- Favor moderate brightness, a soft flood beam for close work, and a narrow beam only when distance requires it.
- Carry spare batteries or a charged backup rather than relying on one light.
No light makes an unsafe bank, private shoreline, closed park, or rough water safe. Check access and conditions before leaving, and do not use lighting to extend a questionable trip.
Match the Light to the Job
Different lights solve different problems:
- A headlamp is the best first choice for walking, knots, bait, and hooks because both hands stay free. Choose a stable strap and an easy-to-find switch.
- A flashlight gives a deliberate beam for trails, drop-offs, rocks, dropped tools, and backup use.
- A lantern spreads light for sorting tackle or packing up, but can increase glare and reduce distant visibility. Use the lowest useful setting behind or beside you.
- A clip light suits a tackle bag, seat, or small work surface, but its direction changes when the bag moves. Treat it as an extra light, not the primary one.
Brightness and Beam Shape
Brightness is commonly described in lumens, but a larger number is not automatically better. High output drains batteries, creates reflections on water, and can destroy night vision.
For line, bait, hooks, knots, and tackle, low or medium output is often enough. Use high output briefly for an access check, distant marker, or search, then turn it down.
Beam shape is just as important as output:
- A flood beam covers a broad nearby area and works well for walking, landing fish, and organizing gear.
- A spot beam reaches farther and helps inspect a trail, shoreline feature, or distant object.
- A mixed beam combines a center spot with surrounding light for uneven routes.
- A diffused beam reduces sharp reflections during close work.
Keep the light aimed at the ground, your hands, or the immediate task. Do not sweep a bright spot across water, roads, homes, or another person’s face.
Red Light and Night Vision
Red light can illuminate nearby gear while preserving more dark adaptation and reducing glare. It may make colors, line types, and hook details harder to distinguish, so use white light briefly for hooks, signs, cuts, and hazards.
Learn the controls before the trip. A dedicated red-light button or mode memory is easier to manage than a switch that cycles through white, red, strobe, and high output. Angle the beam down and dim it before turning toward another person.
Batteries, Charging, and Runtime
Rechargeable lights are convenient for regular trips but must be charged before departure. Replaceable AA or AAA batteries make spares easy to carry in a dry pouch. Judge runtime at the medium setting you will actually use, not only the brief high-output claim. Cold weather can reduce performance.
Before leaving:
- Fully charge rechargeable lights.
- Test the switch and every required mode.
- Carry spare batteries in a sealed case, not loose with hooks.
- Keep a backup flashlight separate from the primary light.
- Do not store a rechargeable light empty for long periods.
A phone flashlight drains the phone needed for navigation and emergencies and is awkward around hooks. Treat it as an emergency backup only.
Waterproofing and Durability
Read the water-resistance rating carefully: rain, splash, spray, drops, and submersion are different conditions. Bank anglers need protection from wet grass and mud; kayakers also face paddle splash and a wet deck. Choose a secure battery door, protected charging port, and usable controls.
Rinse salt residue, dry the light before opening or charging it, and inspect the strap, lens, button, gasket, and mounts.
Bank Fishing Use
Before setting up, use a low or medium beam to inspect the route, bank edge, rocks, roots, mud, drop-offs, and chair location. Look for a retreat route, not just a place to stand.
Keep the headlamp angled down while walking. At the fishing position, turn it off or switch to red mode so your eyes adjust and water glare is reduced. Put a lantern behind your shoulder and away from bait, loose line, and flammable materials.
Check overhead and both sides before every cast near brush, docks, trees, or other anglers. If visibility is poor, shorten the cast, change position, or stop until the area is clear.
Kayak Fishing Use
In a kayak, use the headlamp for knots, lure changes, and landing fish, but keep it pointed down. A high-output forward beam can reflect off the water and hide rocks, wakes, or other craft.
Carry a backup light in a reachable sealed pouch. Secure the primary so it cannot fall when you lean or reach for a net, and keep straps and cords away from paddle leashes, pedals, anchor lines, and hooks.
Navigation and visibility lights are separate from task lights. Follow the required light configuration for the water and craft instead of improvising with a headlamp. A properly positioned visibility light helps others identify you while the work light stays on the deck.
Before launching, confirm that you can reach the light, phone, whistle, flotation equipment, and signaling gear while seated. Practice turning the light on with one hand; if that requires a dangerous lean, change its location.
Night Access Checks Before You Leave
Daytime access does not guarantee night access. Check the exact park, ramp, pier, bank, or shoreline for hours, gates, closures, no-fishing signs, and parking rules. A light helps read a sign but does not grant permission to enter.
When possible, inspect the route in daylight. Note steep sections, loose rocks, fences, private property, locked gates, and distance to the water. Tell someone where you are going, especially for a solo or unfamiliar trip.
Check weather, wind, lightning, water level, current, and temperature. Set a turn-back time. If access is confusing, the bank is unstable, or the kayak cannot be controlled, leave rather than adding more light.
Fishing permission and license requirements are separate from access hours. Review Fishing Gear for Beginners for equipment planning, then confirm current local rules through the responsible agency.
Safe Casting, Hooks, and Glare
At night, the lure can disappear from view during a cast. Use a controlled motion, shorten the cast until the area is known, and keep the hook secured while walking or repositioning.
Before casting:
- Turn the headlamp toward the ground or use a brief white-light check.
- Look behind, above, and to both sides for people, branches, lines, paddle blades, and structures.
- Confirm that the lure and hook are not caught on clothing, straps, nets, or the kayak.
- Make sure your feet or kayak are stable.
- Cast only when the landing area and retrieve path are understood.
Do not shine a bright light at water if the reflection blinds you. Use short checks, a low setting, or a side angle. If a hook snags clothing, stop and use pliers or a cutter; do not pull while looking away.
Keep spare hooks, batteries, and light accessories in closed compartments. Loose batteries can contact metal tackle, and hooks can catch a strap or cord. Keep a hook-removal tool and line cutter reachable.
Storage and Maintenance
After the trip, turn the light off and remove disposable batteries if it will sit unused. Let wet equipment dry before charging or sealing it in a tackle box.
Rinse away salt, mud, bait residue, and sand. Wipe the lens, inspect the strap, and store the light where sinkers, reels, or a cooler cannot crush it.
Keep the backup in the same pocket every trip. Replace batteries before they fail and test the setup before leaving. A light is useful only if you can find, activate, and aim it safely.
FAQ
Are headlamps better than flashlights for fishing?
Usually for close work. A headlamp keeps both hands free for knots, bait, hooks, and fish handling. A flashlight is still useful for a narrow inspection beam and as a backup.
How many lumens do I need for night fishing?
Most close tasks need less brightness than beginners expect. Choose adjustable output and use the lowest setting that clearly shows the task. Use higher output briefly for access checks or distant objects.
Is red light better than white light for fishing?
Red light can reduce glare and help preserve night vision, but white light shows colors and details better. Use red for routine nearby work and brief white light for hook points, signs, hazards, and inspection.
Do I need a lantern for bank fishing?
No. A headlamp and backup flashlight cover most beginner needs. Add a lantern when you need a stable work area, but keep it dim and positioned so it does not reflect into your eyes or another angler’s face.
Can I use a headlamp as a kayak navigation light?
Do not assume so. A task headlamp may be aimed in the wrong direction and may not meet the visibility rules for your craft or water. Use the required navigation or safety light arrangement and keep the headlamp for close work.
What waterproof rating is best for kayak fishing?
Choose a rating appropriate for splash, rain, and the possibility of a drop, then follow the manufacturer’s limits. Keep the light in a secure location and use a sealed backup even when the primary light is water resistant.
Should I fish at night if I cannot check the access point first?
No. Confirm hours, permission, parking, route hazards, and fishing rules before the trip. If the access or retreat route is uncertain, choose a familiar daylight session.
Source Checklist
Before buying or using a fishing light, verify:
- The primary task: walking, close tackle work, bank setup, kayak cockpit work, or visibility
- Headlamp, flashlight, lantern, and clip-light roles in your planned setup
- Adjustable brightness, beam shape, red mode, switch layout, and glare control
- Battery type, realistic runtime, charging plan, spare batteries, and backup light
- Water-resistance limits, battery-door security, charging-port protection, and strap condition
- Bank hazards, kayak storage, paddle leashes, anchor lines, hooks, and loose cords
- Night access hours, gates, parking, fishing permission, and local regulations
- Casting space, overhead hazards, nearby anglers, boat traffic, and a safe turn-back plan
- Storage, rinsing, drying, battery removal, and pre-trip testing
Related Reading
- Fishing Gear for Beginners
- Private Property Fishing License Rules
- U.S. Fishing License Guide
- Saltwater Fishing Gear for Beginners
- Best Fishing Line for Beginners
CTA
Start with a reliable headlamp, a small backup flashlight, and a clear plan for where each light belongs. Check access before dark, dim the beam around other people, secure every hook and strap, and use the right visibility light for the kayak. Good lighting should make the trip calmer, safer, and easier to leave on time.